How-To
Retro Gaming With a RetroPie
Setting up a RetroPie gaming system because I couldn't get a hold of an NES Classic
NES Classic Edition Vs. RetroPie
Like many of my fellow humans, I was excited when I heard Nintendo were putting out a purpose-built NES pre-packed with 30 games. The price was right, too. However, Nintendo only released a small amount to market, making the chances of getting one slim-to-none. Even worse, the scalpers were turning around and selling the things for insane amounts of money. I don’t have time or patience for that shit, so I decided to take matters into my own hands.
I have wanted to mess around with a Raspberry Pi for some time. This project seemed like the perfect excuse to get my hands on one. With the development of the robust RetroPie platform, it was now extremely easy to set up a retro gaming system. The more I thought about it, the better this option looked. Here’s what I did.
Note: I am using a Mac to format and prep the SD card, and grab ROMS. The process may vary for Windows and Linux users. Hey, if you’re on Linux, I’m pretty sure you know what’s up anyway.
RetroPie Pros & Cons
Pros
- Cheaper than NES Classic (if you already have a supported controller)
- You get to geek out, play around in the command line, etc.
- There is an enormous amount of platforms and games at your disposal
- You can use a variety of controllers, both wired and wireless
- The system is highly configurable
- Large support community
Cons
- You have to work to set it up, whereas the NES Classic is plug-n-play
- When you start to dig below the surface to configure, it's not intuitive
- You have to seek out ROMS and manually install them which I find tedious
- It doesn’t lend itself to intuitive use for the family room. On/off is plugging and unplugging the unit, and the OS makes it easy for my five-year-old to poke around and break stuff
Kit
Bare-minimum Required
- Raspberry Pi 3
- Power supply
- Monitor
- USB keyboard
- SD card
My Kit
- Raspberry Pi 3
- 1 Controller
- Power supply
- Case
- Heat syncs
- SD card
- USB Keyboard
- Monitor
- HDMI cable
- USB flash drive
What I purchased
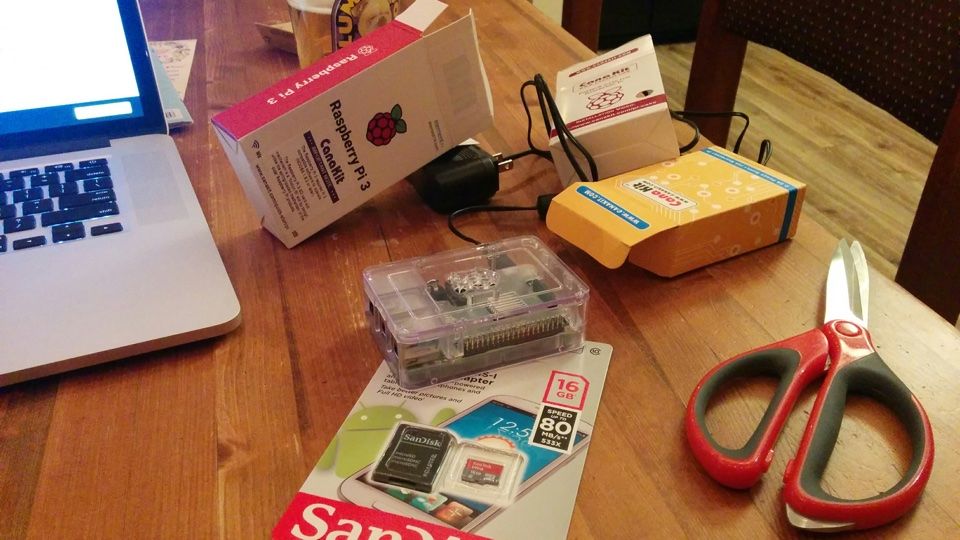
Raspberry Pi Kit - $49.99
You could just get the board, but honestly, for just a few bucks more you can get a case, heat syncs, and a power supply. I was too lazy to go and see if I had the correct power supply laying about, and I knew that if this thing was going to be in the family space, it would need some sort of protection.
SD Card - 16gb - $6.99
Your SD card needs to be dedicated to the RetroPie, so I didn’t use any I already had. I’m also not planning on loading up every game known to man, so 16gb seemed appropriate. I’d say at least get a 4gb.
Grand Total - $57.57
The NES Classic Edition is $59.99
That’s it, that’s all I purchased. Of course, you can go as bare-bones or as far as you like. But, seeing that I have monitors, controllers, etc., that’s all that is necessary.
Installation, Setup Process
Time Elapsed: 35 minutes
It would have even been shorter, but I had to help my 2 year old go to the potty, and hunt down an HDMI cable buried in my basement to hook up to a monitor.
Download the Software Image File
Getting the RetroPie image is easy to do, just grab it from the RetroPie site. I used the Raspberry Pi 2/3 distribution which was the latest at the time of this article.
RetroPieUse an Extraction/Setup App
For the Mac, I used RPI-sd Card Builder. It felt a tad shady, but everything seems to be okay. Nothing exploded and I probably haven't been malwarized. Make sure your SD card is plugged in. Launch the app and follow the steps. Choose the card as your destination, then be patient. There’s no UI to tell you progress. Trust that something is happening. You’ll get a prompt when it’s done.
RPi-sd cardPlug it in
- Stick the SD card in the Pi
- Hook up a keyboard and controller (I did PS3 controller) to USB
- Plug in the power
Once the power is plugged in, the Pi will begin its initial boot-up process. It does not take very long, and since you have loaded up the SD card with RetroPie, the service will automatically start.
Aaaand DONE! It was that fast and easy.
Games
The RetroPie isn’t much fun without games, so you have to get some. Take a look at the video links I provide below, and follow their detailed instructions.
USB Stick: less than ideal
In short, you need to format a USB stick to FAT-32, create a folder called "retropie" in the root, then plug the stick into your Raspberry Pi. It will set up everything it needs inside the retropie directory, prepping it for you to load up ROMS.
When you have your ROMS, load them into the appropriate folders in your prepped USB stick, then place it back in your Pi. Allow the games to transfer to the SD card, reboot, and you are ready to go.
Wirelessly: ideal
On a Mac, while in Finder select Go from the menu, then choose Connect to Server. Enter smb://retropie and hit enter. Sign in as a Guest, and you're off to the races. The only drawback is the time it takes to transfer. Depending on your wireless connection, larger files could take quite a while. Because I'm a glutton for punishment, the first games I transferred this way were for PS1, and my god were those big files.
Again, watch the videos for important tips and processes for doing this.
Resources
Guides, Configurations, & Documentation
- Official site & download links
- Github site
- Lifehacker how-to
- SD card setup app for Macs
- Setup guide for a PS3 controller user
- Another detailed vid guide
- Controller configs
ROMS
I am not at all up on how to get ROMS and all the in’s and out’s. It took me a while to figure out what’s up. I also don’t torrent, which is apparently how most people do it. But that's for people who don't already have the physical games cartridges, etc.
Simply Google what you're looking for. Poke around and experiement for sites that provide a descent quality emulation. So far, for me, it’s been a bit trial and error getting a good emulation, and I did download some pretty weird, buggy shit.
This is by far the biggest con for the whole RetroPie thing. RetroPie cannot provide ROMs since laws vary from place to place regarding copyrights, and they can't just give games to people who don't already have the physical, legit versions. Because of these reasons, the whole process has been tedious.
Tips
This section is a compilation of all the niggly things I had to figure out along the way.
Warning On Prepping SD Card!
When prepping the RetroPie image, make sure you first extract your img.gz file with the Mac file system so that you are left with an .img file. It will not work if you still have the .gz extension still there. I did not do that the first time around, and it bricked the SD card. I had to erase it and start over.
Patience in Transferring ROMS
Be patient when loading games, and pay attention to your flickering flash stick light. That's your only indication of progress. If it's flickering, leave it alone. Transferring ROMS can take a while.
Enter the Game's Config Menu
From inside any game, press select + x to enter a config menu. From here you can do quite a lot, including configure shaders.
How to exit a game
Press Start and Select at the same time. My goodness this took me forever to figure out.
To The Command Line!
F4
How to exit the command line
Type `exit`. Emulationstation will restart.
Your RetroPie installation will probably not look like the video tutorials
After installation, the only screen available to me was the setup utility. When I looked at the videos, people had games and platforms automatically available to try. I really thought I had a bug.
Everything was completely fine, however. It turns out RetroPie is now being shipped sans any platforms or games to make the initial file size for download smaller. Just get some games loaded up on the unit and you’ll be off to the races.
Shaders
In my opinion, this is a must. Most of the retro games were made for old CRT screens, not our fancy-pants HD screens. You can apply shaders to simulate the old screens which I find actually makes the gameplay more fun.
While you can set up the shaders per game by accessing `select` + `x` in a game, I went ahead and just applied a global shader via the command line.
-
F4
to hit the terminal, then:sudo nano /opt/retropie/configs/all/retroarch.cfg - Find `video_shader` pretty far down the list, and here is where you choose your shader type. I have shown the one I like, which seems to be the typical one folks use. Delete the hash and fill in the deets:
video_shader = "/opt/retropie/emulators/retroarch/shader/crt-pi.glslp"
- Un-comment the `video_shader_enable` and set to `true`
video_shader_enable = true
- Now you're done. `Ctrl` + `x`, `y` to save, `Enter` to confirm, then type `exit`, then reboot.
Continuing the Retro Experience
There’s nothing in this article that hasn’t been outlined elsewhere, but hey, it’s a chronicle of my experience. The most frustrating part of the entire process was getting the SD card out of its packaging. Well, that and trying to figure out why I didn’t have any initial games to play. Okay, and being completely confounded on how to exit a game. That said, if you’re willing to put in a bit of effort, I think the RetroPie route is a far better one than NES Classic.